Quest for the Perfect Click
10 Aug 2012While searching for reasonably priced mechanical keyboard, I decided to pillage the archives of the keyboard enthusiast community to learn what I could about what makes these bad boys click, and to put together a list of contenders I wanted to test personally.
After some searching, sorting and filtering I decided to make my first buy. A Leopold FC200R with Cherry Brown switches. On paper, the brown switch is perfect. It provides tactility without much noise, and features a low key activation force, making it easy to glide over keys without any effort but with all the assurance of accuracy. I ordered the FC200R from EliteKeyboards and it arrived later that week.
The first thing that jumped out at me when unpacking the $100 keyboard was its exceptional build quality. At almost 1kg the FC200R is no Apple Bluetooth Keyboard. Instead, it feels like a small typewriter sitting on your keyboard tray. The bezel is slightly rounded and made of high quality plastic; very little space is wasted or non functional. The Otaku version of the FC200R takes the minimalism a step further and removes the key labels to leave you with a subtle but elegant typing instrument. No corners are cut in the manufacturing of this keyboard. It has no apparent wobble or structural abnormalities, the rubber feet are well placed and properly glued onto the base, and the USB cable is removable in case you’re unhappy with its length. There was not a thing about the device that made me regret dropping a hundred bucks on it. That is, until I started typing.
My idolized Cherry Brown switches left something to be desired. They felt all wrong and I wasnt sure why. The activation force wasn’t prohibitive, the noise level was reasonable, and the tactile bump was present when slowly depressing the switch. At normal typing speeds however, the bump just created unnecessary friction instead of acting as a tactile feedback mechanism. Typing on the Cherry Browns felt like driving a Ferrari with the parking break up. I tried it for a couple weeks, and still wallowing in dissapointment, dropped another $100 on the Cherry Blue version of the Leopold.
The Cherry Blues were noisy, as expected. Except the noise they make isn’t of the typing like a boss variety that comes from the Model M’s buckling springs. Instead, it is more akin to typing on egg shells. Assuming you can get past the high pitched clicking, the Cherry Blue is a big improvement in terms of feel. It’s tactile click is snappy and brief, giving you immediate feedback, instead of the scratching feeling that the Cherry Browns induce. All I needed now was for Cherry Corp to make some kind of freak hybrid switch with the tactility of the Blues and the sound of the Browns. Lo and behold, after a few hours of research, I found out about a relatively rare Cherry Clear switch. It has a larger tactile bump than the Browns, in addition to a much stiffer spring. I wasn’t interested in the extra stiffness, but I was desperate for some tactility. It just so happens that Cherry Corp uses identical switch housings in the many variations of the MX Switch. This makes it possible to pry open the 87 tiny black boxes and replace their brown innards with those of a donor clear switch, producing, what the internets christened the Ergo Clear.
The Swap
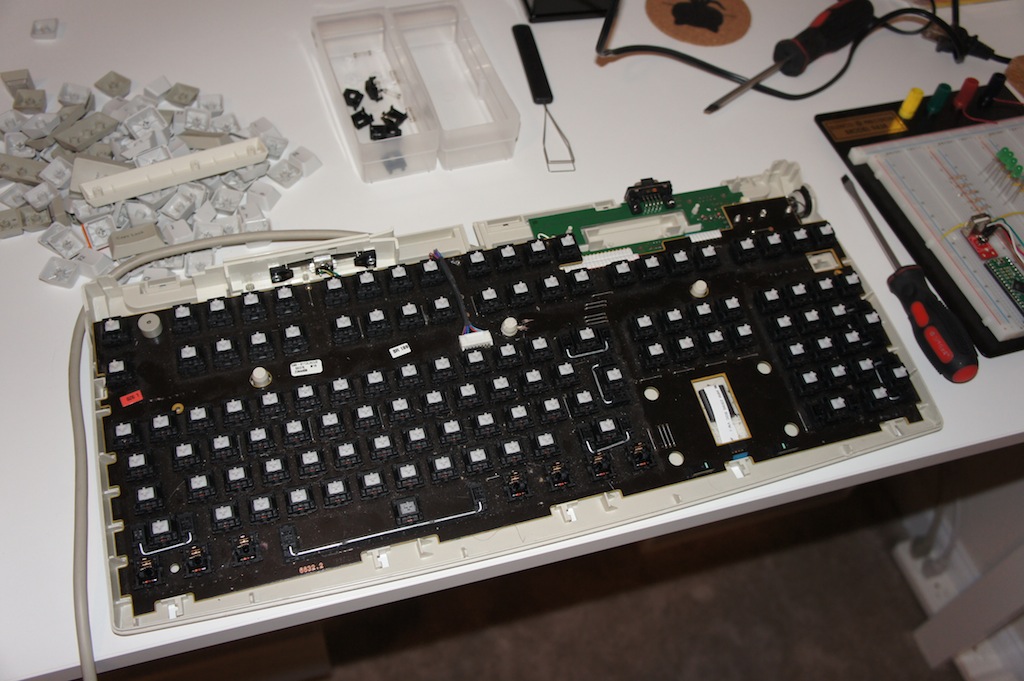
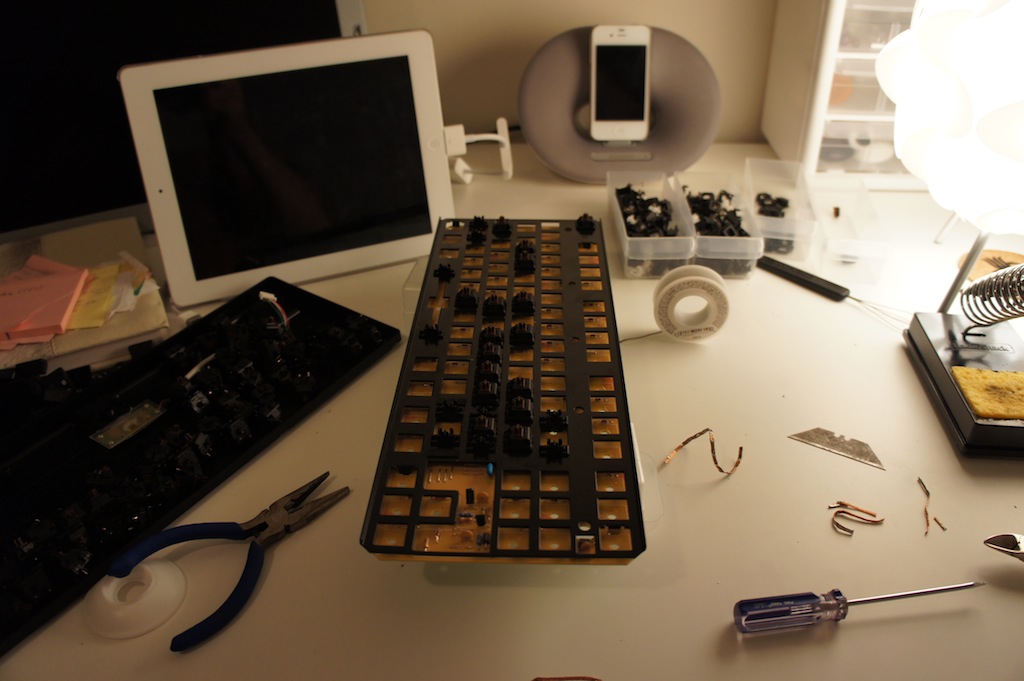
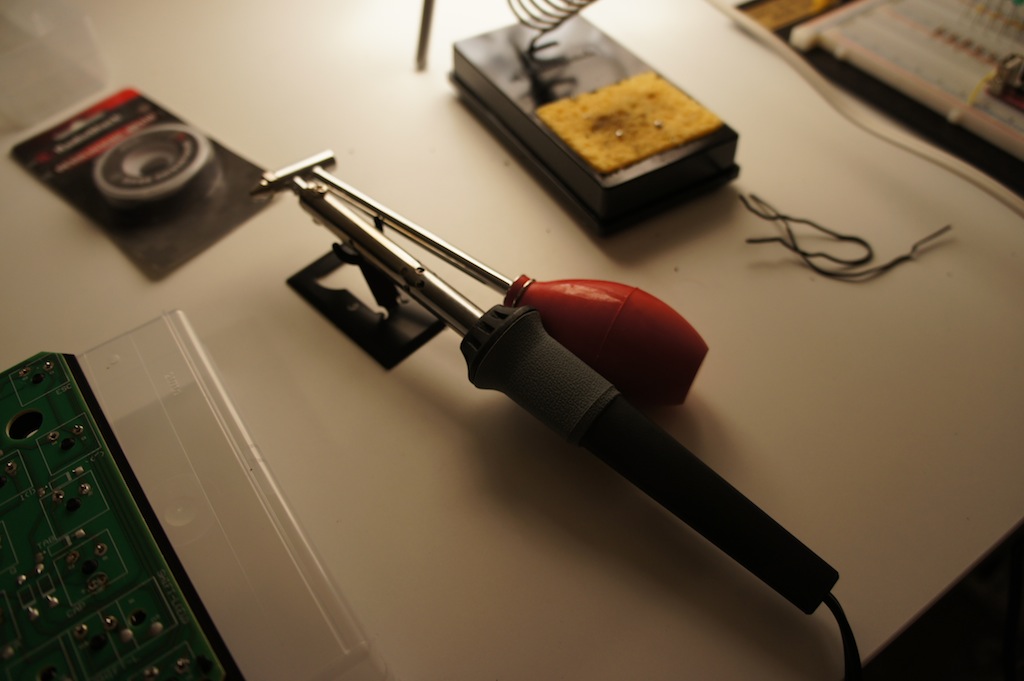
Armed with this knowlege I jumped on the classifieds board of GeekHack and dropped some hard earned cash on a donor Cherry MX8100 which uses the revered Cherry Clears. My hands were itching to start the project but my enthusiasm was quickly grounded by the bleak, dark reality of a forum thread which outlined the switch replacement process. Swapping the switches on the FC200R requires desoldering every single one of the 87 switches, pulling them out of the metal backplate, replacing their insides, and resoldering them one by one once the stem swap is complete. Nevertheless, with both keyboards already taken apart on my work table there was no turning back. I cleared my schedule for the day, pulled out my trusty soldering iron, ran to the nearest Radio Shack to buy a desoldering braid, and got to work.
The Cherry MX8100 Donor Board
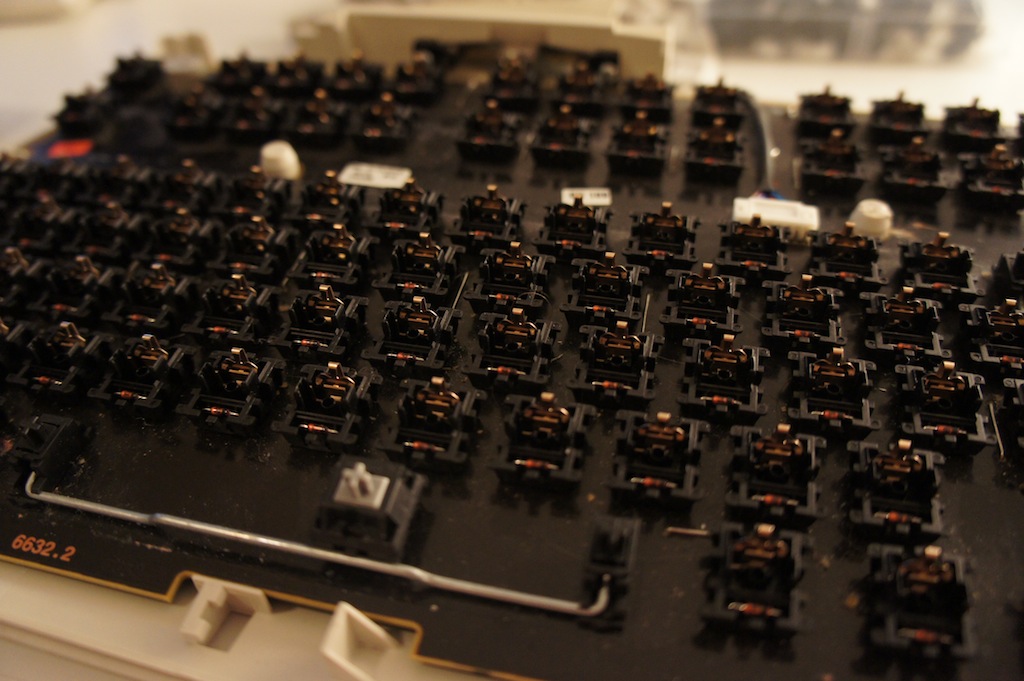
Unlike the FC200R, The MX8100 has PCB mounted switches, meaning that it is unnecessary to desolder them in order to unlock their housings and harvest their organs. Popping them open is relatively easy using only a small flathead screwdriver.
The Leopold is held together by three screws and a few plastic clips.

Once the bezel was removed, it was time to attack the PCB. The two solder points around each black insert are the legs of the switch, which is where the desoldering should happen. A word of caution. Unless you’re a wizzard with a desoldering braid I would highly recommend investing in a desoldering iron with a suction bulb, which is ~ $10 at your local Radio Shack. It will save you a great deal of time. If you do decide to go with the braid ( a mistake I made ) you need to make sure to remove all the solder on each contact, leaving the leg of the switch unobstructed and easy to pull out (I learned this the hard way as you will see in a bit ).
A desoldering iron with a rubber vacuum bulb
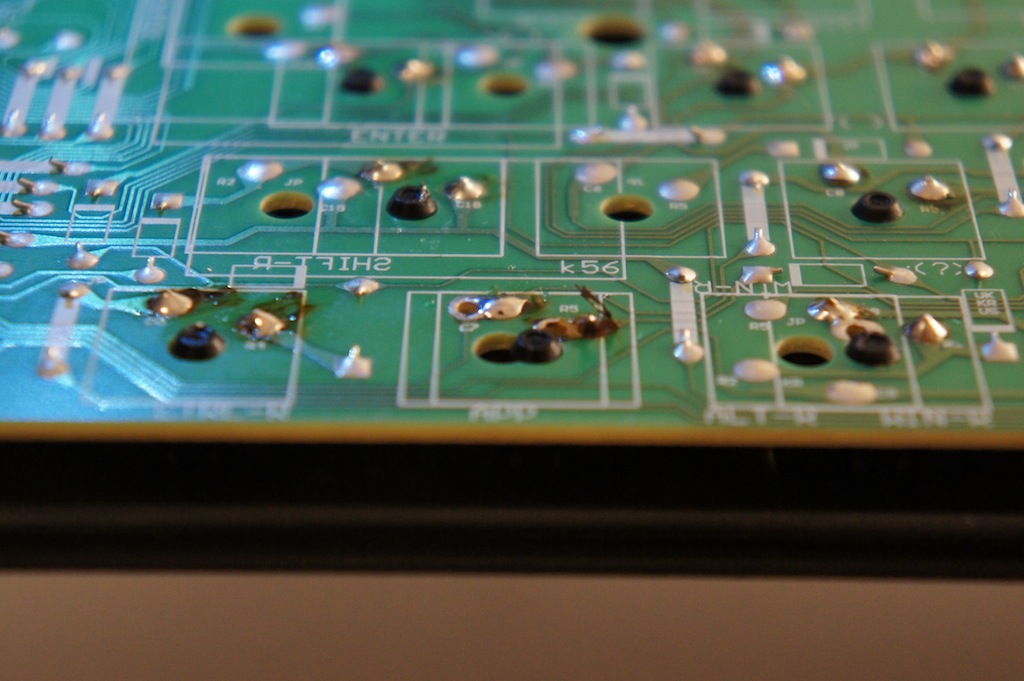
Once all the switches are desoldered, removing them is a matter of a prying and pressing firmly on the round switch insert on the back of the PCB. Once again, if the switch doesn’t want to give, make sure that both legs are desoldered completely. Don’t try to force it, you WILL damage the PCB (scarrier than it sounds, see below for PCB repair).
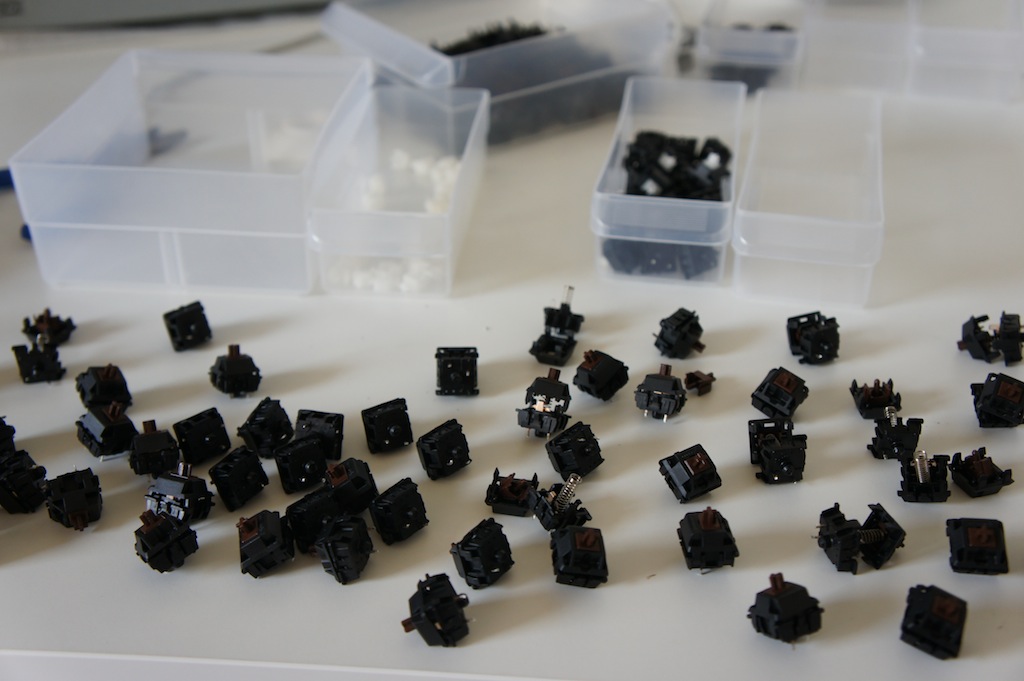
Replacing the internals is a simple, mechanical, and appropriately time consuming task. Just pop the swtich open, remove the brown stem, and replace it with a clear one. Replace the spring as well if you prefer the stiff feeling of the stock Cherry Clears.
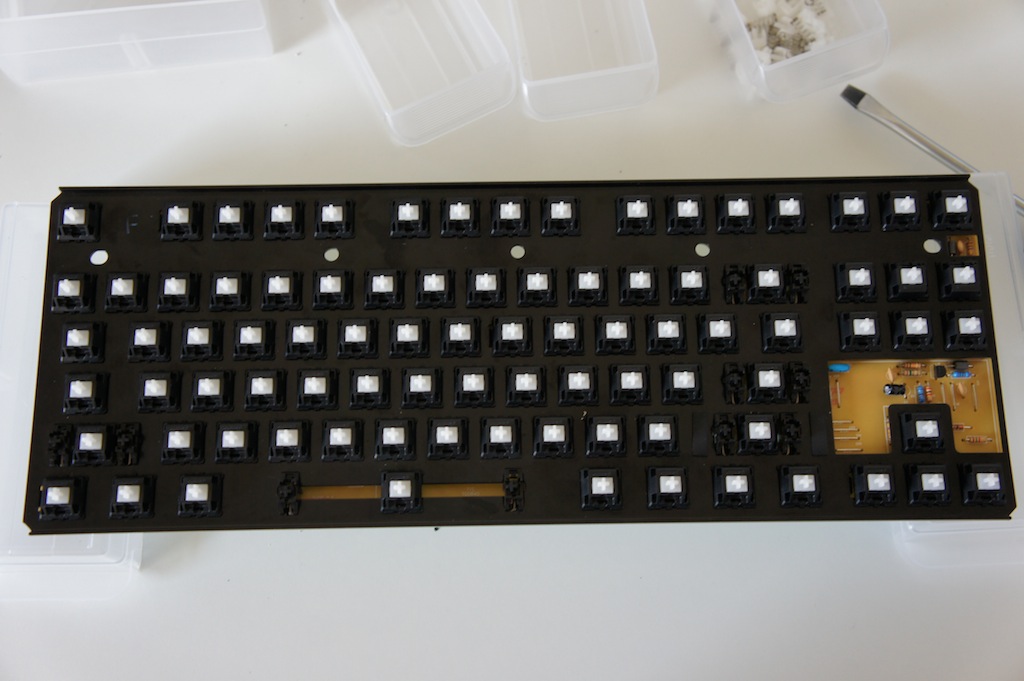
Once the switches have been put back together, insert them into the back plate, making sure that the legs slide back into their original positions.
Resoldering should be much easier than desoldering.
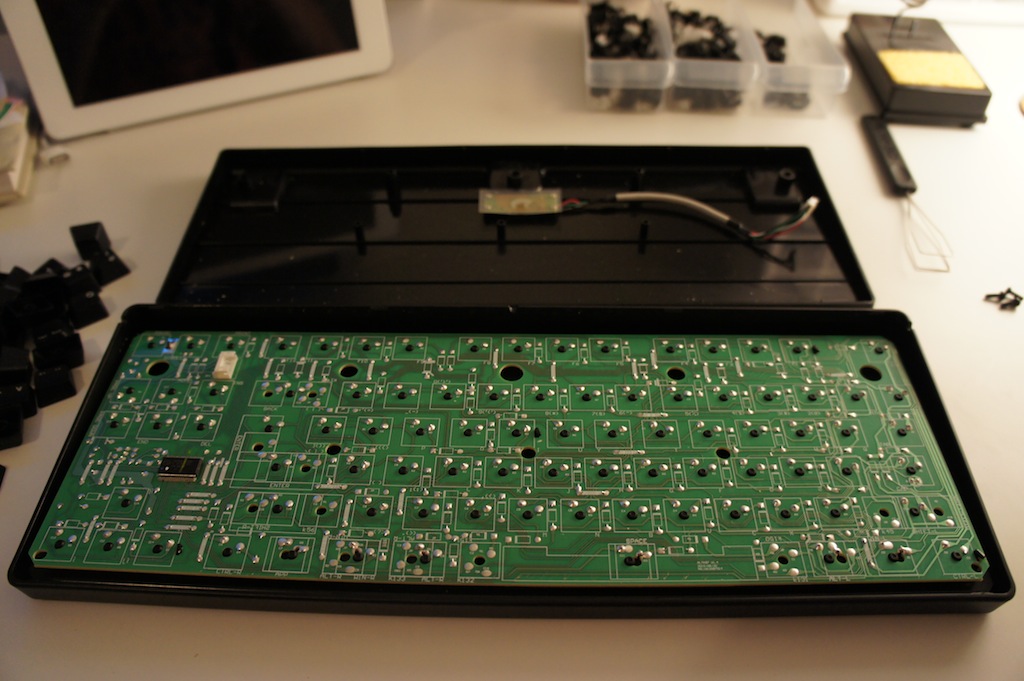
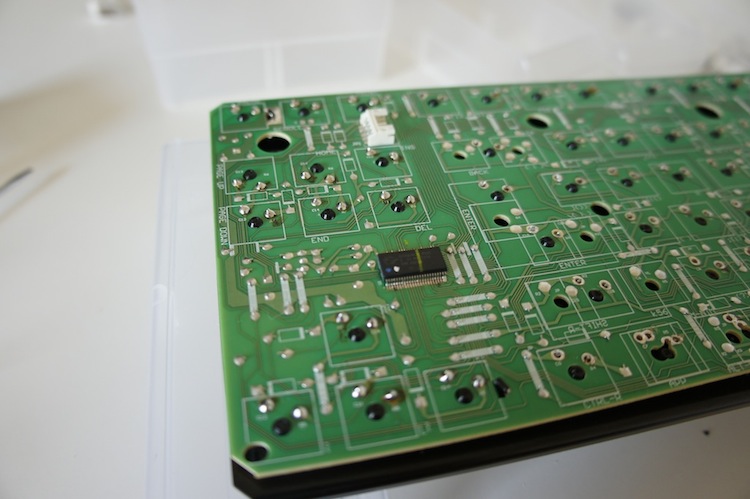
It’s possible to damage the PCB contacts when forcefully removing the switches from the back plate.
Instead of trying to fix the damaged contact simply follow the path to it’s destination and solder a thin wire from the switch leg directly to the end contact of the wire path.
Once all the switches have been resoldered, but before reassembling any further, make sure to plug the board in and test every key. Use an app such as KeyCodes for OSX to make sure all key presses register. Fix any bad contacts and put the keyboard back together.

Conclusion So was it all worth it? At first I wasn’t sure. The springs from the Cherry Browns seemed a bit weak for the larger tactile hump of the Clears, which caused the switch to be sluggish on its way up. However, this did not affect real world performance like I thought it would. The switches feel great. The Ergo Clear is what the brown should have been. The only improvement I’d recommend for this mod is to use a slightly stiffer spring (+5cN or so). The Cherry Blue might prove to be a good candidate in this regard.
I have typed on quite a few other mechanical keyboards since the arrival of my first Leopold. In the end, the Cherry Blues ended up growing on me and are currently my favorite switch. The Ergo Clear board is what I use for work on account of the noise. As far as the layout and construction goes, I love the 87 key form factor and the build quality of the FC200R. I own three Leopolds (Blue, Ergo Clear, Red) and a Realforce 86U Topre board. If you type for a living and have never owned a mechanical keyboard, there is no excuse not to invest in one. They come in all shapes and sizes, and can be easily resold for most of their retail value if for some reason you’re unsatisfied. Your hands will thank you and your coworkers will be jealous (or really annoyed). Happy Hacking!